Introduction
When I was working on healthcare, at the Virgen de la Victoria Hospital in Málaga (Spain), the hospital had a big problem regarding the medical history archive. They needed to store tons of documents generated every time a patient visited the hospital. Even though most documents were created digitally already there were still a lot of documents that needed to be printed and stored, for example, those that needed a signature. Also, the problem was not just the new documentation printed in paper, but the huge amount of medical records stored in paper from years ago, as the hospital is responsible, by law, to store all the records for several years. So this was creating several issues at many levels:
-
Logistical issues: There had to be a physical space where to keep all those documents. Every day, a person had to look for the medical records of the patients who had an appointment the following day and have them ready to send them to the corresponding department in case the doctor needed them.
-
Economic issues: The space required to store paper was growing, and third party companies needed to be hired to store documentation outside the hospital as well.
-
Productivity and medical assistance issues: Doctors have very little time for each patient, so it was not practical to have to search the entire medical record in paper a specific document. However, it may be that there was a significant piece of information in there that was relevant for the patient’s current treatment.
After researching the commercial options, we concluded that none would suit the needs of the hospital and that is why we decided to start the design and implementation of a customized solution.
One of the most important factors when designing the system was that it had to comply with the current regulations to guarantee security and access to data since if it complied correctly, it would be possible to destroy the paper documentation. That will mean freeing a lot of space, reducing costs, and human effort in its treatment.
Workflow
The scanning workflow can be divided into three main steps:
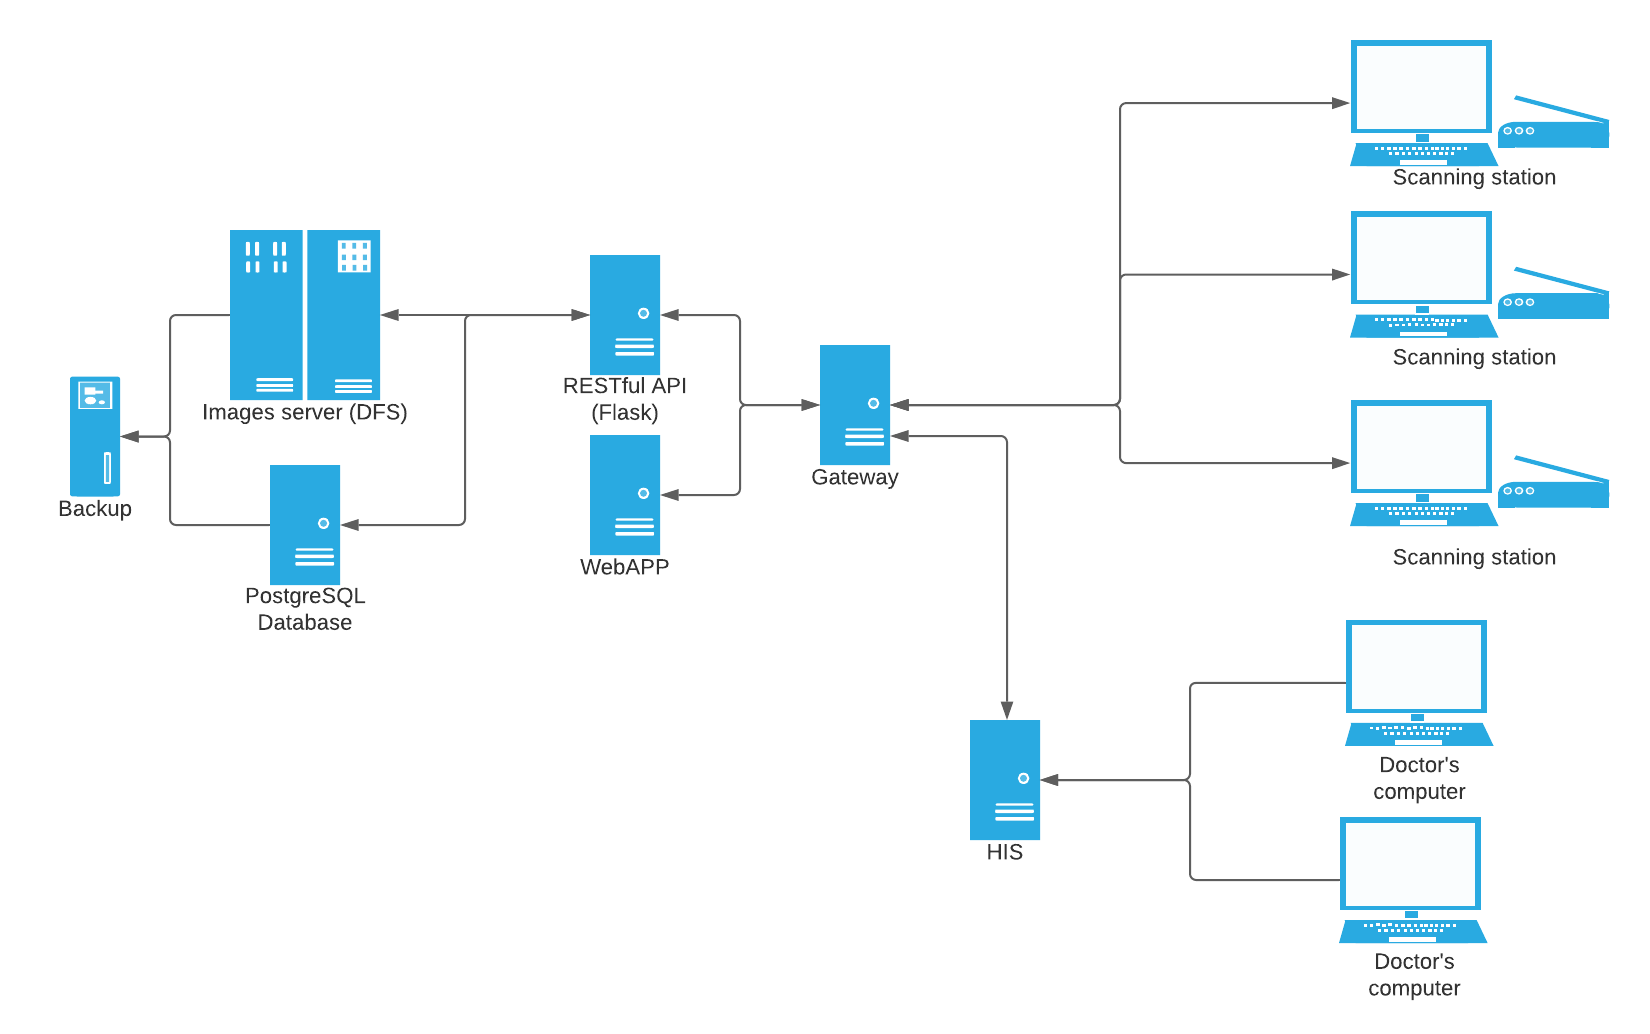
- Images scanning: An operator will scan a batch of documents that will be sent to a remote server, creating an entry in the DB.
- Assigning images to a patient: From the scan station, the operator can see all the batches, edit or remove images, and assign them to patients.
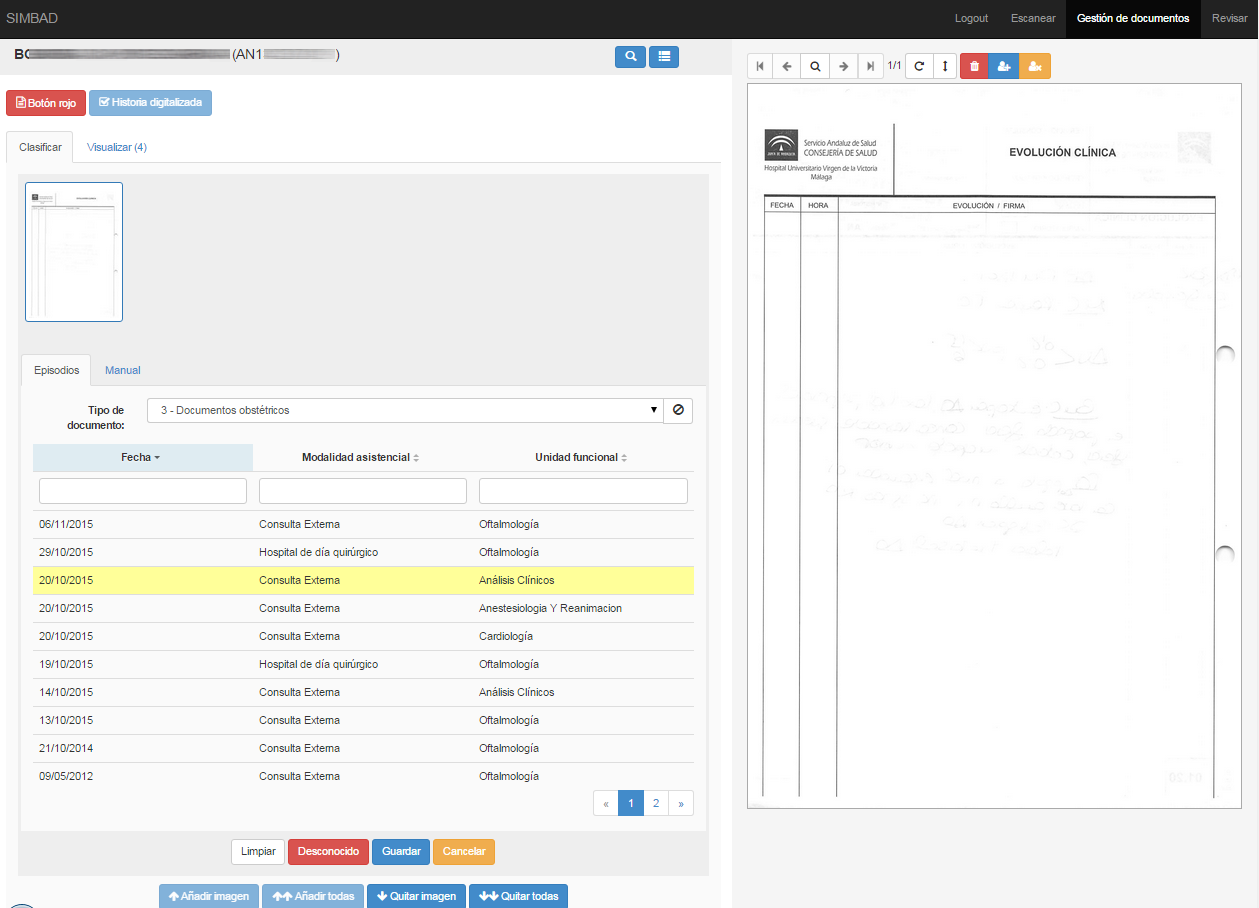
- Classify images and creating documents: If the operator doesn’t do anything else, the patient will have a PDF with all the images assigned to him. But the operator could go further and classify the images, for example collecting a group of images and assign some metadata to them as “Laboratory test” and a date. So the doctor could see a more granular view of the information. For this classification step, we use Tesseract OCR to identify some values in some types of documents, although currently with the help of ML, a first classification could be done even more automatically.
System diagram
Tech stack
The tech stack for the system is composed of the following layers:
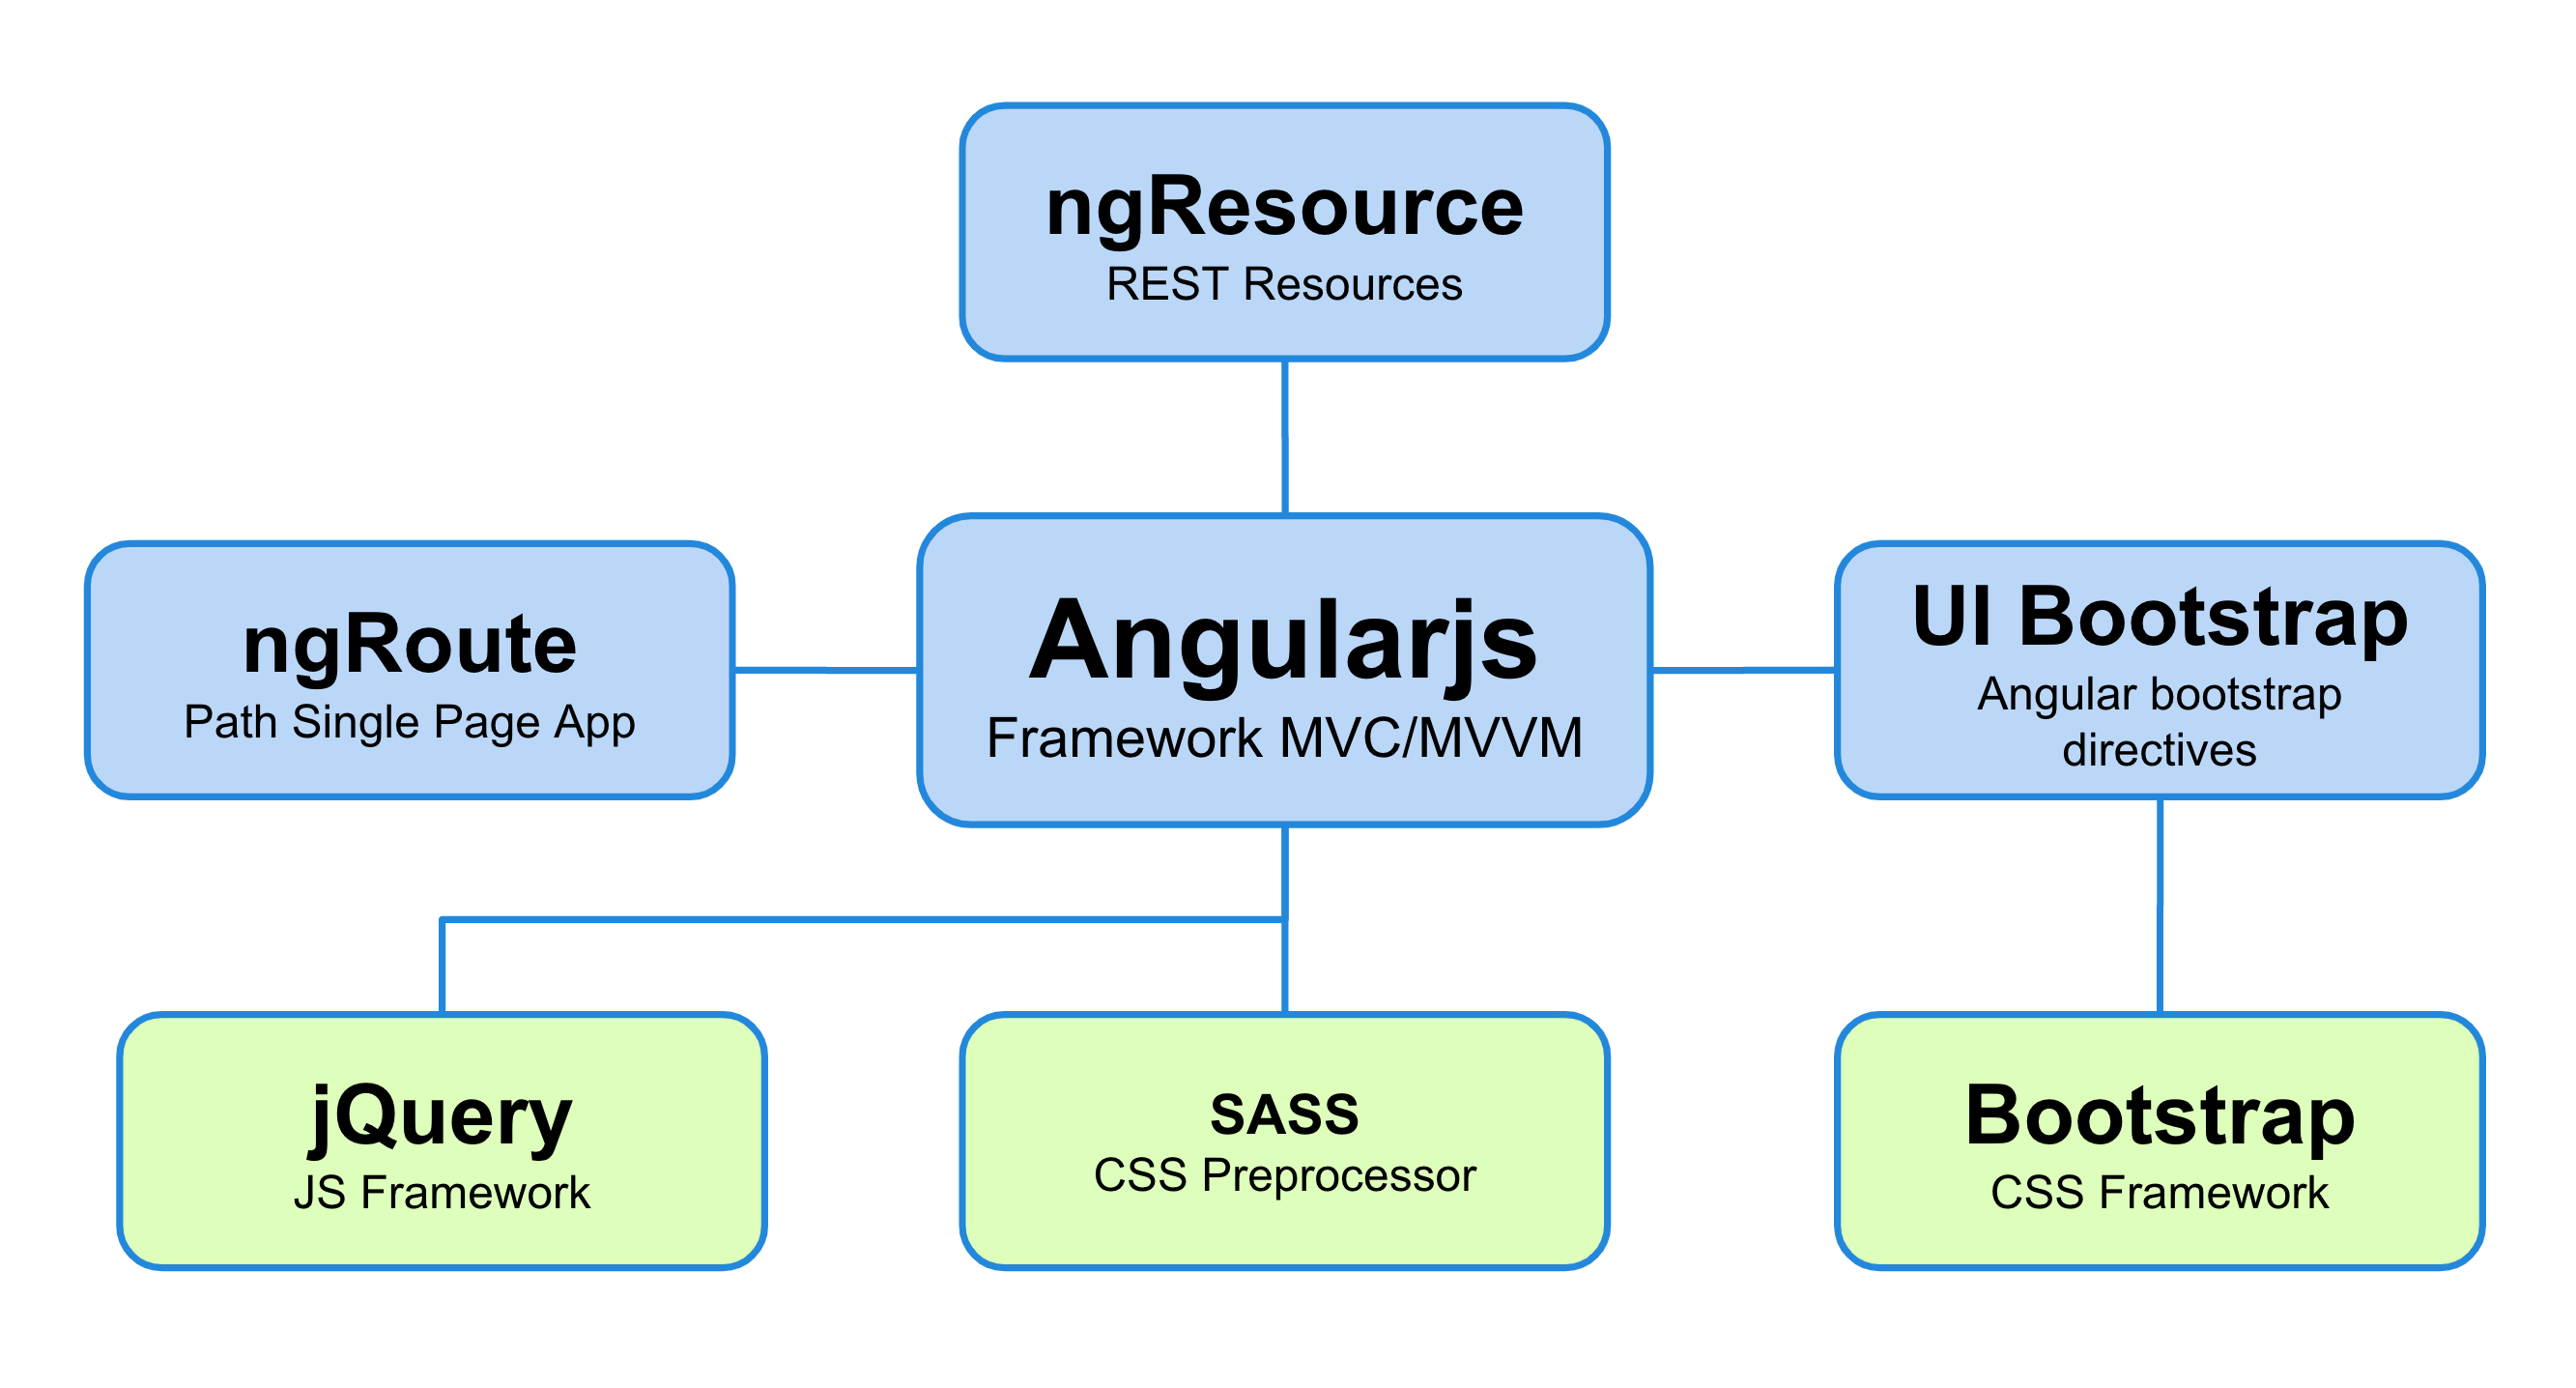
- Clientside: The frontend was created mainly with AngularJS and Bootstrap for the UI.
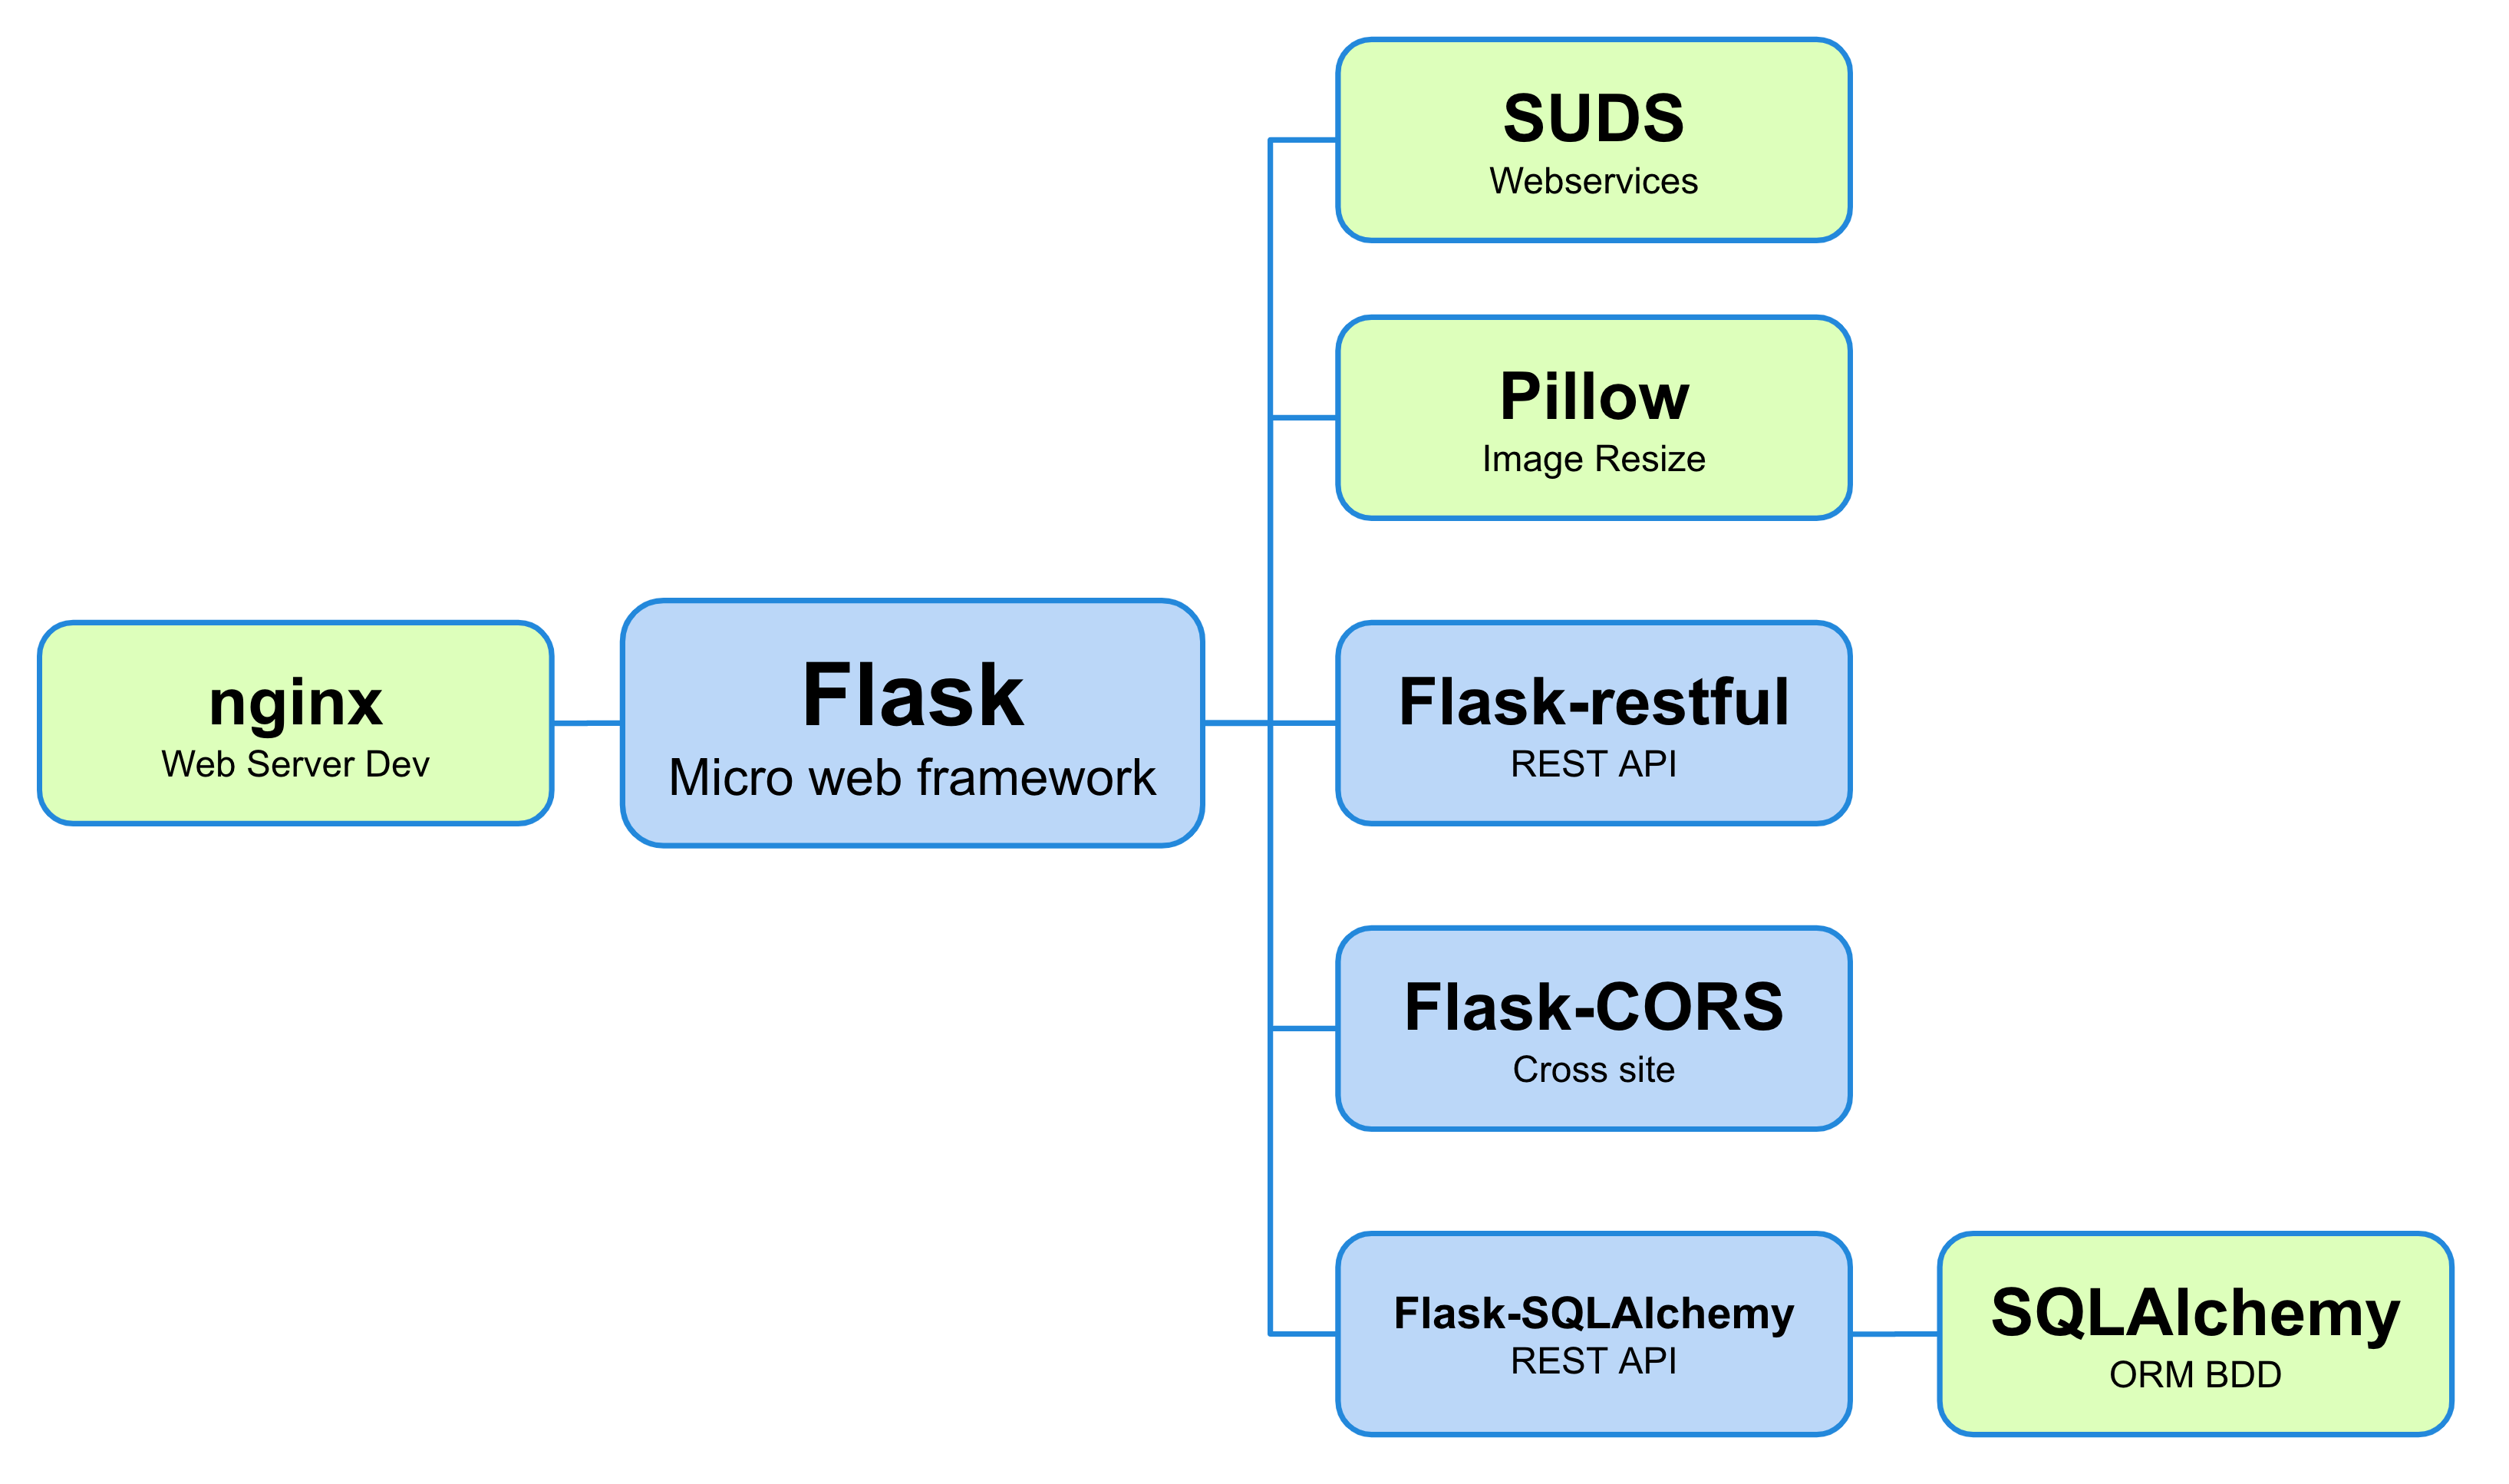
- Server/Proxy: Nginx with uWSGI to connect with the Flask backend.
- Backend: The backend exposes a RESTful API with token-based authentication, connected to a PostgreSQL database. This service was built using Python and Flask.
Backend service technologies
Frontent application technologies
Servers
Frontend UI
Scanning
From this section, users could review the scanned images, remove or modify them and assign them to a specific patient.
Classifying images
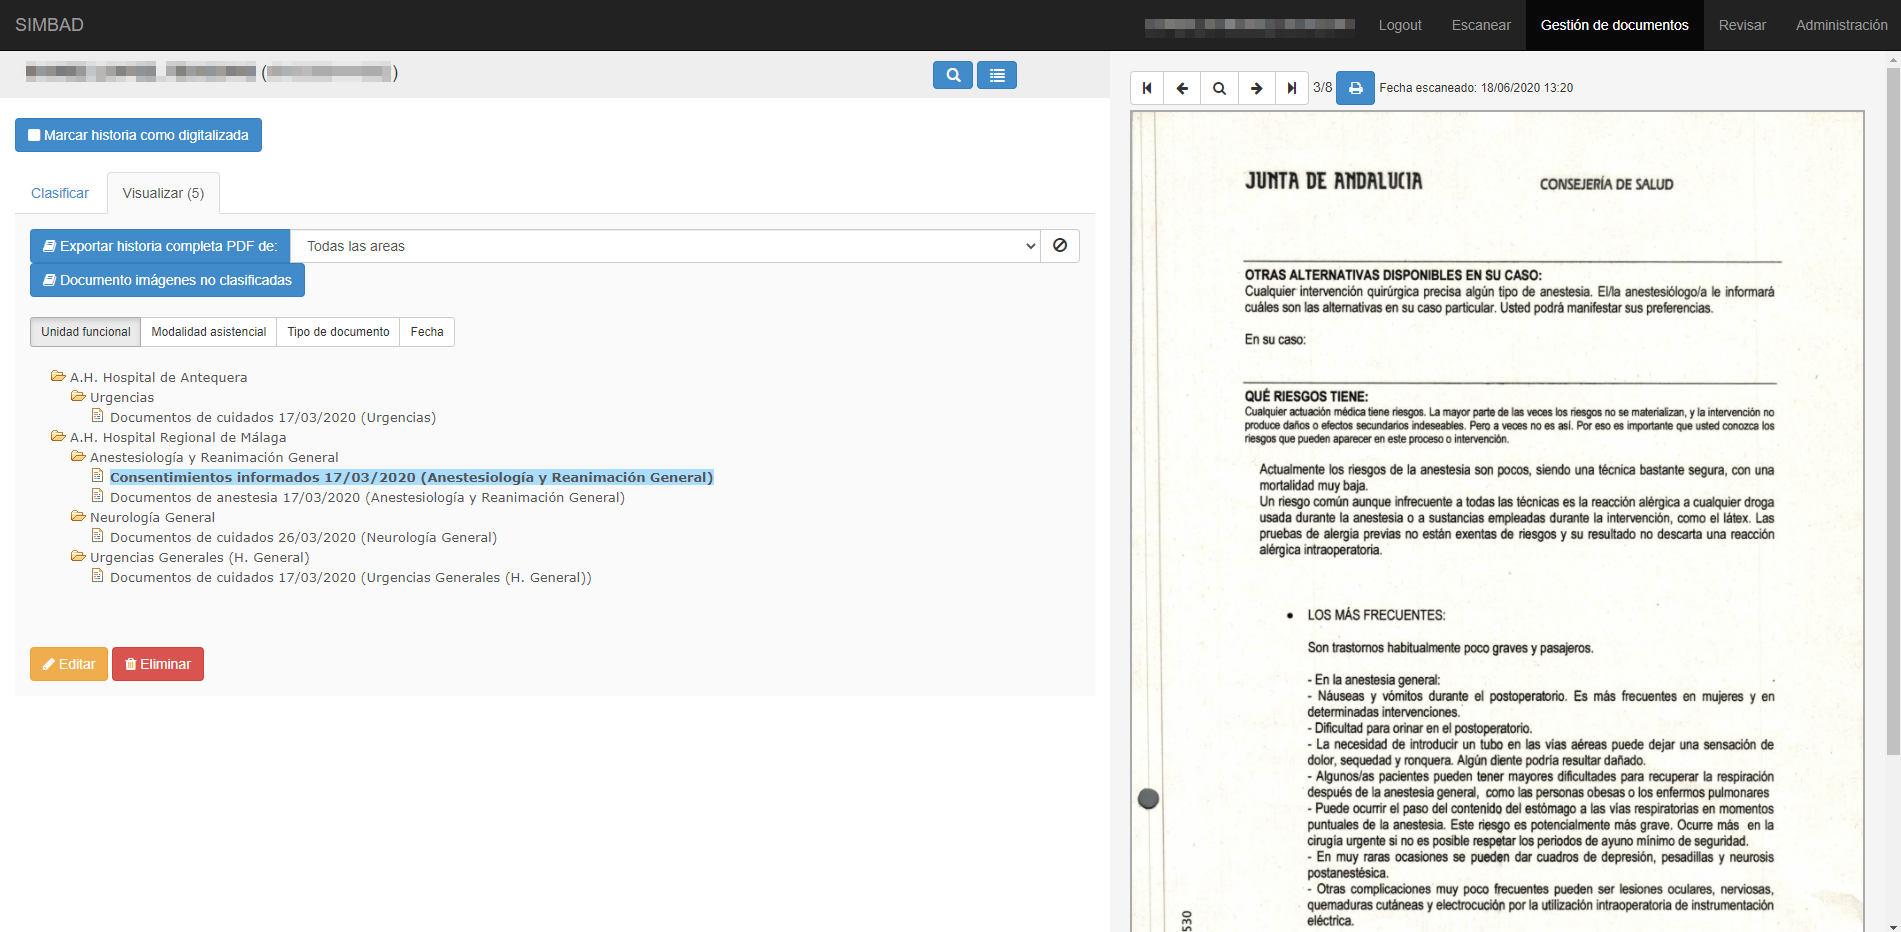
Once the images are assigned to a patient, you could review them and create documents by grouping and classifying few of them. The user will attach some metadata to help ordering and searching for this document, basically: date, department and type of document.
Users could also preview the documents tree with multiple options for sorting and arranging the information.
Admin panel
We created also an admin panel where you could search for specific patients or documents, modify all the attributes for each image or document, emulate how doctors will see the information and get some statistics of the whole system.
Integrations
Doctors can review the scanned medical history from different applications, since we also implemented an authentication system for third party applications, so it is possible to easily create integrations and display such information. The following screeshot is an example of such integration with the Hospital's HIS.


